Category Archives: Recipes

IMG_6032-954x1024

MAC n CHEESE PASTA

By | Recipes | No Comments

In my life, I have tried to replicate Mac n Cheese so many times, but have never really gotten as close to the real taste of the dairy version of Mac n Cheese.

I remember those days. The creaminess, the mush of the melted cheese and pasta on my tongue, creating an amazing sensation to my taste buds all the way to my brain.. hahaha…oh so yum!

But gone are those days. Ever since I started to learn more about myself and my (temporary) gut issues, I have learnt to be wiser around food. I say “temporary” because I am so keen to heal it and I know it will, one day. Not that I’d go back to eating like crazy again, but I know enough to love my body more and give it what it needs.

These days, if I eat any dairy product, I get bloated and I either get some sort of diarrhea or constipation. Same thing with pasta. I can only eat good organic gluten free pasta, to make sure, I am not just enjoying a dish momentarily, on my tongue. But a dish I can devour slowly and not give me stomach cramps from bloating afterwards. In short, I have some sort of fruit malabsorption but also some signs that are pointing to leaky gut. So really, I am still working on it with my kind naturopath acupuncturist and homeopath. I love them.

I did try to eat some goat cheese, a few months ago, when I was in Yarra Valley, Victoria, Australia at a small farmers’ market.

I bought some from a woman who made her own goat’s cheese at home. It was so adorable. She even knew the names of her goats and asked for their permission ☺

Apparently, goat’s cheese, I still can take. But still, never much. Cow’s cheese? I will just stay away from ☺
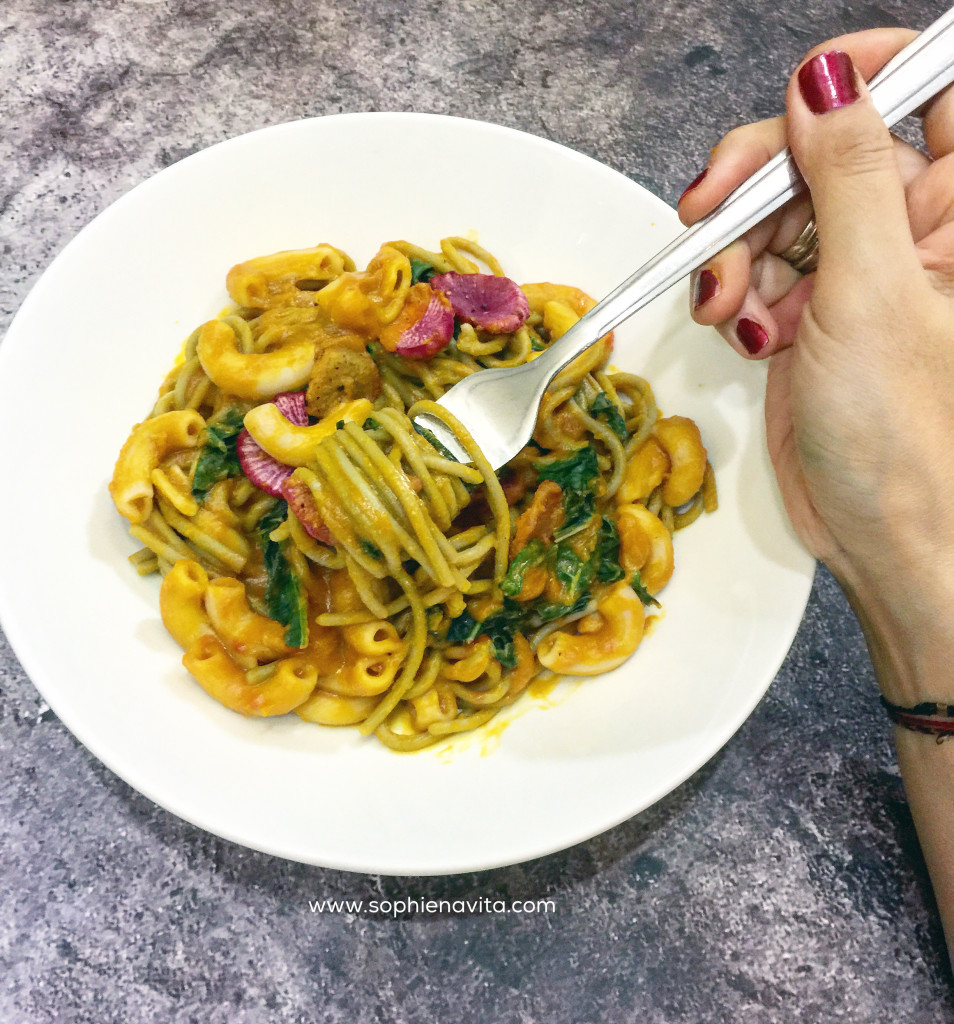
Good thing is, I was never a Cheese Lady. So giving up cheese was never an issue for me. But even so, the need to enjoy a good Mac n Cheese, every now and then would turn up and that was when I started recreating this dish to really taste like the “real thing” ( although when you look at it from a whole food’s point of view, it isn’t the “real thing” is it? Ha..)

We can sit here and debate on what the real thing and not is, or we can sit and discuss this next recipe I am going to share with you. Ready? Grab a notebook and pen, jot this down. Or better still, just screen shot the page, will ya?

bigstock-pumpkin-103665434

Here’s the magic ingredient. Yes. PUMPKIN!!! Who’d have thunk? Right?!!

INGREDIENTS:

2 cups chopped and boiled pumpkin
½ cup finely chopped brown onion
2 teaspoons finely minced garlic
½ cup tomato purée
¼ cup veggie broth
1 tablespoon lemon juice
1 tablespoon tamari (low sodium soy sauce)
1 teaspoon maple sugar or a smidgen of stevia powder
2 tablespoons nutritional yeast
½ -1 cup veggie broth on standby just in case needs thinning
2 ½ cups pasta of choice

DIRECTIONS:

First, heat a pan, then throw in brown onion and dry sautée until fragrant. Be careful not to burn the onions, we just want it to caramelize a bit to give out a fragrance.

Next, add the chopped garlic and stir. If you get nervous and think you might burn the onions, you may add just a bit of the standby veggie broth or add 1 teaspoon of coconut oil, if you choose to make this dish with oil. Your choice. No wrong or right, here, you make the call.

Once the onion and garlic are really fragrant, add in the tomato purée and stir for about 3 minutes, then turn heat off.

Put boiled pumpkin in a blender with ¼ cup veggie broth and blend until smooth. Next, add the tomato purée with the onion and garlic you previously sautéed and blend until smooth.

Pour that blend back into the pan and heat again until it gets thick. Add in lemon juice, sweetener and nutritional yeast. Stir and let it thicken. If it gets too thick, here is where you can use your on standby veggie broth.

Turn heat off and start preparing your pasta. Remember that gluten free pastas need a lot of water to cook evenly. If you go skimpy on the water, your GF pasta will start to stick to one another and you do not want that.

Here is how you cook pasta the RIGHT WAY

So please try to make this dish and tell me how you think it tastes. Or maybe, you have other variations to share? Please do in the comments. Don’t forget to tag me on instagram @sophienavita .. I’ll be waiting!!

zucchini

ZUCCHINI BROWNIES

By | Recipes | No Comments

Say whaaaa?!!

I know, right… A vegetable in a brownie? What’s next? A tomato in a cake?? Well… to be honest, I already have a recipe for that, just need to polish a bit more here and there, since that tomato cake recipe was from my late grandmother. HA HA!

It was the BESTEST cakest everest!! 😀

I just need to tweak it a bit more into a healthier gluten free version for me. And you, of course. How could I forget you?

So anyways, for those of you who think a zucchini is some Italian pasta, well, it’s not. It’s a vegetable, much like a cucumber, but so different in texture and taste.

I’ve used it to make raw dips, and Zoodles (zucchini noodles). I’ve roasted them and baked them, eaten them raw, I just love zucchinis because of their bland taste. So easy to mould into anything you want it to be. But I must warn you though, zucchinis cry a lot. They weep. They let out water, since they’re such a high water content vegetable . Which in this case is good. To achieve a moist cake.

So this is Zucchini. Or Courgette in some countries.

Okay, without further a do, here we go with that recipe:

IMG_6053

INGREDIENTS:

  • ½ cup shredded zucchini (peeled) (manually grate or use food processor)
  • ¼ cup coconut flour
  • ¼ cup almond flour
  • ¼ cup GF all purpose flour
  • ¼ cup light buckwheat flour
  • 1 cup water
  • ¼ cup plantbasedmilk
  • ½ cup applesauce (apple puree)
  • 7 drops Medicinal Flower Vanilla extract
  • 1 tbsp flaxmeal
  • ¼ cup Coconut Oil
  • ¼ cup raw cacao powder or unsweetened cocoa powder
  • 1/4 tsp salt
  • 1 teaspoon baking powder
  • 3/4 cup xylitol or sugar of choice ( I just prefer xylitol)
  • 1/16 tsp pure stevia powder,
  • ¼ cup mini chocolate chips, optional

DIRECTIONS:

Firstly heat your oven to 180 celcius ( around 350 F)

Combine all your flours in a bowl with the baking powder and cacao or cocoa, and xylitol and stevia + salt and flax meal.Mix.

Now add water and plantbased milk ( I used almond milk) and mix until incorporated well . Add the Vanilla extract, applesauce, and coconut oil last and mix some more with your spatula.

Pour into a baking tin and bake for around 25 minutes.

(You need to check though, if you have an oven that has not been calibrated in a long time, It may take a little longer. )

Add the optional chocolate chips just before baking. I used ¼ cup vegan choc chip on one side and just a tablespoon of vegan carob chips sweetened with stevia on the other side, because my parents also wanted some cake as a treat, and they have just recovered from being hospitalized from heart attack and high blood pressure (I know, right?? But they have been so good, I thought they deserved a treat ☺ )

Note:

I used Medicinal Flower extracts not because I am endorsed, I just LOVE this product. They are high quality, no nonsense, no alchohol extracts with such a range of flavors to choose from. They even have coffee WITHOUT the caffeine. They have a special way of extracting it, that makes it that super special. I love companies that do things with LOVE.

I also used xylitol, because I don’t believe in putting to much sugar in my diet, especially when it involves my children and parents. Xylitol is taken from the birch sap and is so so so much lower on the glycemic index, although it is still a processed food.

Okay, do try it out and see how you go. I hope you try it and tag me on my instagram

Have fun!!

IMG_6141

IMG_4986-1024x1024

COCONUT FLOUR WAFFLE – PANCAKE

By | Recipes | No Comments

I had written this recipe down in the previous weekend but couldn’t decide on a name for it. So, I just put down a temporary working title.
Turns out, come the day to publish it on my blog…..I STILL CANNOT FIND ANOTHER NAME FOR IT 😀

I guess it’s because, it’s just the way it is. I can never decide whether to make a waffle or a pancake whenever I try this recipe haha.. Is that okay? To be indecisive when it comes to waffle pancake business?

I’d like to thank each and every one of you who really took the time to wish me Happy Birthday a few days ago. I really read them all and sent you back well wishes, for taking the time to wish me well. I am so lucky. BLESSED.

What did I do for my birthday? Well, my husband took me on a quick getaway trip to Singapore, to watch one of our favourite musicians and songwriter, Richard Marx. I enjoyed myself, especially the chance to get to celebrate my 40th birthday, back in the country where I was born.

Were you a Richard Marx fan too, back in the day? He had that signature mullet and black leather jacket with his scratchy high pitched voice. LOVE.

Okay, enough about my birthday. I am so happy to be 40. It feels really good! But now time for my Pancake Waffle Recipe.
Here goes:

INGREDIENTS:

  • ½ cup coconut flour
  • ¼ cup almond flour
  • 1 ripe banana
  • ¼ teaspoon baking soda
  • ½ teaspoon cinnamon powder
  • 2 tablespoons your favorite natural nut butter of choice (I used hazelnut butter)→ optional but recommended
  • 1 flax egg ( 1 Tbsp flaxmeal mix with 3 Tablespoons water)
  • ¼ cup water
  • coconut oil to grease pan
  • Vegan Buttermilk:
  • 1 Tablespoon lemon juice or Apple Sauce
  • ½ cup plantbased milk

DIRECTIONS:

  1. First make your flax egg by mixing 1 Tablespoon Flaxmeal with 3 Tablespoons water. Set aside
  2. Make vegan buttermilk
  3. Put vegan buttermilk and ripe banana in a blender and blend until all incorporated. Or you can manually mash the banana in the buttermilk
  4. Combine Buttermilk with the rest of the dry ingredients plus the flax egg and mix well.
  5. Heat a non stick pan on small to medium heat and VERY lightly coat with some coconut oil, either using a brush or a paper napkin dabbed with some coconut oil ( you have to be patient with coconut flour, it will burn when the pan is to hot)
  6. Spoon in 2-3 tablespoons at a time and spread it a bit. Wait until the surface bubbles and the edges are beginning to firm up THEN flip.
  7. Enjoy with your favorite toppings like blueberries, strawberries, fruit jam or chopped bananas.

This was my waffle version. The one on top was my pancake version. See how indecisive I can be, at times? Ha!

Please do make your own version and tag me on instagram.

I love coconut flour, since it’s glutenfree and my tummy agrees with it. But you need to use tons of moisture when working with coconut flour, since it soaks a lot of liquid.

I really hope you loved my blog today. Yep, Richard Marx and GF Pancake slash Waffles.

Oh, if you haven’t bought my 21 Days of KEEPING IT REAL breakfast recipes, you need to.
and here it is in Bahasa Indonesia, in case you need to give someone a gift

soph1

PINEAPPLE TAHINI COOLER

By | Recipes | One Comment

Hello there, it is soooooo hot today in Jakarta, Indonesia, where I live, that I have decided to not have lunch.

I don’t know about you, but it is hard for me to chew and enjoy my food with sweat running down my forehead, back and neck.
Yeah, that’s how hot it is. I think it hit 35-36 celcius today. Not just because it’s still dry season here. Although, this dry season has gone on for a bit too long. Usually in October, rain starts to fall. Nothing yet until now ☹

So on days like these, when it is so hard to munch food, I actually really listen to my body and not eat, but drink more.
Yes, of course there is AC in my house, but I never out on air conditioning until the sun sets. Why? I just find it more natural, even though I’m sweating like a (cute) pig (and looking like a fox ha ha )

You see, when you crank up the AC in times of heat for the whole day, your body does not get hot and it tricks the mind to think that it is not hot and automatically, you will drink less, whereas in reality, it is blazing scorching hot and the body NEEDS hydration and only by NOT being in 24-7 air conditioning (AC) will our minds know that. That is the way I see it, I hope it makes sense to you.

Also, cranking up the AC will only contribute to making your environment an even hotter place. Uh-huh.. Have you ever gone outside to stand in front of your AC’s outdoor unit? Give it a try and tell me how hot it is. Then multiply that by the number of people cranking up AC all day, everyday. Offices, malls, cars, schools, you name it. It makes me wonder sometimes, if we all did it together for just a day of no AC, I bet we would feel cooler air straight away. But, we need to try that together. Everybody at the same time.

Well, that is my opening line and now here comes my recipe. It’s SO SIMPLE, you will not believe.

PINEAPPPLE TAHINI COOLER

soph2

INGREDIENTS:

1 cup frozen chopped pineapple
1 cup almond milk ( or other plant based milk)
2 cups of loosely packed Swiss Chaard, stems/ removed, leaves chopped (or greens of your choice)
1 T tahini
1-2 passionfruit (scrape the insides )
1 tsp lemon juice
½ tsp powdered stevia

DIRECTIONS:

Blend everything in a high speed powered blender and enjoy. Oh wait! Take a picture first, tag me on instagram @sophienavita then enjoy. HA !!

NOTE:
Tahini is just ground down sesame seeds. So peanuts make peanut butter, almonds make almond butter, and sesame seeds make … TAHINI . Please don’t ask me why, they baptized it to a different name altogether haha!)

If not using frozen pineapples, make sure you blend this smoothie with ice cubes and make sure your almond milk is cold ☺

Oh, if you haven’t bought my 21 Days of KEEPING IT REAL breakfast recipes, you need to.
and here it is in Bahasa Indonesia, in case you need to give someone a gift

PINEAPPLE LOVE

trr

TURMERIC LATTE FROTH

By | Recipes | 2 Comments

Hey, how have you been? Back here, in Indonesia, it’s just been hot, hot, hot and hotter.
It’s been a long time since the rains kissed the earth here on the Zamrud Khatulistiwa .

Although I live in polluted and jammed packed Jakarta right now, I am still grateful and in so many ways, better off, than my fellow Indonesians in the Sumatera islands or Kalimantan (Borneo).

As you know, it’s the dry season here, and usually at this time of the year, forest fires make their way through irresponsible people’s hands. I am not pointing fingers, but it is more than obvious that big companies are responsible for this. Mostly palm oil mega companies.
Apparently it is so much easier to just burn down the forest for more land to grow more palm oil, for….what? ☹

Children and senior citizens are getting sick each day with respiratory disease and even dying from it. It is such a heart breaking situation and there is not much I can do, except send my prayers, and continue my consistency of avoiding all products made with palm oil.

Yes, cooking oil, to soaps, to shampoos, have all been changed in this house. We started a few years ago, actually, and although in some cases it might cost a little more, my family and I have committed to this and we will stick to it. We try to save money from cutting other expenses, and so far, I’d say we’re doing good ☺

I felt like sharing this recipe with you today, since it involves turmeric, an herb, a root plant widely used in Indonesia, with Coconut Oil (cold pressed and organic) , a superfood oil we have been using when we need oil at home, instead of palm oil.

Turmeric is used in so many Indonesian recipes, from savory stews like the Rendang, Opor, Soto, to the very famous Jamu. An Indonesian concoction of a healthy elixir formulated from our ancestor’s recipes and usually includes the mighty Turmeric.

tr

Turmeric is so full of benefits. It is high in antioxidants (cancer fighting as we know) and it also helps warm the digestion and body.

I know, I said it’s been hot here without the rain, but lately I have been craving for some turmeric and the way I imagined to have it, was warm, with a little touch of (good) fats.

Hence the TURMERIC LATTE.

trrrrr

Recipe:

INGREDIENTS:

2 cups of water
2 cups of almond milk (homemade if possible is best)
1 tablespoon local honey, optional
1 teaspoon (for each cup) coconut oil, optional
1 teaspoon ground turmeric or 1 Tablespoon minced fresh turmeric
1 cinnamon stick or 1 teaspoon ground cinnamon
1 Tablespoon minced fresh ginger or 1 teaspoon ginger powder
small pinch of black pepper

Simply put turmeric, ginger, all herbs and sweetener EXCEPT coconut oil into a small saucepan with 2 cups water and bring to a gentle boil.

Once boiled, lower the heat and let it simmer for another 15 minutes. Strain and pour into 3 different cups or mugs, set aside

Warm the almond milk in the saucepan until gently heated, not necessarily boiling hot. Use a frother or manually whisk until you get some froth in the milk, then distribute the frothed milk among the three cups of turmeric concoction.

Add 1 teaspoon of Virgin Cold Pressed Coconut Oil in each cup and froth again.

trsh

Sprinkle a bit of nutmeg powder or cinnamon powder and serve warm. Enjoy ☺

Note: You can always use a smidgen of stevia if you cannot take sugar or sweeteners like honey

This Turmeric Latte feels very warm in the body and it definitely helps me wind down and sleep at night.
It also is my go to drink when I am having a cold or cough. You must try this.

Don’t forget to tag me on my instagram @sophienavita please, if you decide to make it (you must, you must, you must)

Oh, if you haven’t bought my 21 Days of KEEPING IT REAL breakfast recipes, you need to.
and here it is in Bahasa Indonesia, in case you need to give someone a gift

pizza2-1024x1024

PIZZA PIZZA

By | Recipes | No Comments

I have made quite a number of pizza versions in my life. From the ones I’m proud of, to the ones that were just an epic fail, due to my experimental nature.

If you read my GLUTEN FREE PIZZA CRUST and TOMATO TORCH GINGER POMODORO then, I’m willing to bet, you have tried it out too, your version.

Why am I writing up another pizza recipe then? Here’s why.

I totally made this recipe up, because I was trying to clean out the fridge! Ha ha!

Lately I have had the SPRING CLEANING FOREVER syndrome in me, and I just felt that no matter how I cleaned, there will always be more stuff to de-clutter.

HOW IS IT, THAT WE BUY SO MUCH STUFF WE DON’T REALLY NEED? –says this woman who gets excited over a brand new note pad every time she steps into a bookstore? 😀

Before sharing this recipe with you, I just wanted you to know that it was truly inspired by my de-cluttering habit.

Especially after I read this BOOK. I’m telling you, it IS THE BOOK! For all you messy people (myself included) fear no more. CLEAN UP and see how much clearer your mind can become! And no, I am not being endorsed! It just moved me.

I first found out about this book, from my friend Reza Gunawan and Dewi Lestari. Reza is a talented piano player who has “disguised” himself successfully has a an acupuncturist for more than 12 years now, I think (but really, he is a good practitioner, I have been going to him for 10 years now)
His wife, Dewi is a singer, songwriter, turned very successful Indonesian author, who is my friend from Uni days. Such beautiful people, these two.

But enough about them, haha (sorry Reza and Dewi). So I learnt about this de-cluttering book from them. And ever since, my tidying up methods changed.

1209_kondo-bookCover

THE LIFE CHANGING MAGIC OF TIDYING UP by Marie Kondo

I got a little bit carried away, and de-cluttered my refrigerator too, and here’s the PIZZA PIZZA now for you.

snpiz

PIZZA PIZZA

INGREDIENTS:

2 Gluten free pizza bases (around 8 inch diameter)
1 ½ cups Tomato Puree
1 cup diced tofu ( around 4cm or 1 ½ inch cubes)
1 cup brown button mushrooms (sliced)
2 teaspoons minced garlic
1 teaspoon turmeric powder
2 teaspoons balsamic vinegar
1 teaspoon seasalt
1 teaspoon blackpepper
3-4 cups spinach
1 teaspoon Virgin Coconut Oil
Optional:
Arugula or rocket salad and chopped basil for topping.

QUICK NOOCH CHEESE:

3 Tablespoons Nutritional Yeast
2 ½ Tablespoons water

Mix these together for a quick liquid like cheese.

METHOD:

1. Place tofu cubes in a bowl and season with tumeric and balsamic vinegar, set aside

2. Heat a non stick pan with the Coconut Oil and start to sauté the minced garlic, taking care to not burn them. Once fragrant, add the spinach and a pinch of salt and some blackpepper , and sauté for 3 minutes only, as we only want it to wilt. Set aside

Note: the reason I did this, is because in Jakarta, I do not get the English Spinach usually used in salads. I get local spinach which are much harder to wilt, and needs some sort of mild heating prior to baking it in the pizza later. You can also use your English Spinach raw if you want. But my local spinach will not cut it, it will taste hardy. Here’s a picture of it, just in case you wanted to know ☺

spinz

3. Wipe your non stick pan, quickly put in the seasoned tofu cubes and grill them for a bit until browned on both sides. You need to keep your eye on this process, so the tofu does not burn. The balsamic vinegar will help the tofu to caramelize a bit, but also will burn easily if you don’t pay attention, (I have done that, and boy, did I regret).

4. Set aside.

5. Now, take the pizza base and spread the Tomato Puree on it generously, but remember, you need to spread wisely, as you have two bases.
Arrange the spinach, then tofu, then mushrooms, drizzle with the Quick Nooch Cheese and place in a pre heated oven at 175 Celcius or around 340 F for 5-7 minutes.
Take out, drizzle more Quick Nooch Cheese with arugula leaves + chopped basil and serve.

Note:
You can also use my TOMATO TORCH GINGER POMODORO for the Tomato Puree. If you do buy store bought ones, just make sure the ingredients are just TOMATOES and probably a bit of salt and nothing else. Beware of sugars and other additives in store bought Tomato Puree.
Same goes for the store bought Gluten Free Pizza bases. ALWAYS READ THE INGREDIENTS. I try to keep them under 7 ingredients. The simpler the better, for me, at least. You can always make my GLUTEN FREE PIZZA too, if you want. You can always make extras and freeze them, ready for Pizza Night, any night!

Don’t forget to tag me on instagram at @sophienavita or my Facebook page Sophie Navita when you try them.

Please drop in comments too, and I will read them☺

One more thing… I send out Love Letters each month, or twice a month when I have something really interesting to share with you and I can’t wait ☺ so please do subscribe to my LOVE LETTERS FROM SOPHIE now

1

GLUTEN FREE PIZZA CRUST

By | Recipes | No Comments

Have you ever wanted pizza so bad, you had to come up with your own recipe?

I think I am talking about me ☺

I have accepted the fact that I cannot eat “normal” pizza. The wheat makes me bloat and I get all crappy. I am not going to get theoretical right now about how refined white flour in the pizzas of today are just so non beneficial for you, but they truly are. They are difficult for the body to digest, since the body considers them as something which isn’t food, they are starchy and high in sugars, high in calories and just almost nothing in nutrition.

If you happen to live somewhere where Gluten Free is a condition that most people recognize, it might be easier for you.

Whenever I am living in Melbourne or Singapore ( I travel in between for work and school), it’s easy to find a gluten free pizza base option in specialty stores. But when I am back in Jakarta, Indonesia, for a bit, that is almost impossible. Eating the way I eat here, is hmmmm…. Considered unique 😀

I am not saying that store bought gluten free pizza bases are the healthiest thing on earth, but I must admit, it makes my life much easier when I am on the go .

Just in case you wanted to know how I make my GLUTEN FREE PIZZA BASE, here it is for you. I snuck in some veggies in it too.
My kids don’t know that, and although they would eat vegetables, I just like that I am sneaking in more veggies, just for the sake of feeling like a Mission Impossible agent, doing the impossible. Did I tell you, that as a child, I always wanted to be a secret agent slash spy kinda thingy? Ha ha.

2

Gluten Free Pizza CRUST:

Wet:
3 cups cauliflower florets
2 tbs fresh lemon juice
—————————
DRY:
1/2 cup almond flour
1/4 millet flour ( or sorgum )
2 tbsp coconut flour
1/4 tsp baking powder
1 tsp chickpea miso ( optional but recomended)
1 Tablespoon nutritional yeast ( optional but recommended)
2 Tablespoons flaxmeal
Pinch of seasalt
Smidgen of stevia
1 Tablspoon coconut oil
Almost 1/4 cup of water or veggie stock (depends how dry your dough is)

Method:
1. Put no.1&2 in food processor and blend (or steam cauliflower first and mash if you don’t have FP)

2. Mix the above with all dry ingredients. You should add in liquid slowly. DO NOT overwet. It has to be a bit sticky but NOT liquid.

3. Flatten on a pie tin or any baking tray you have( lined with baking paper) bake at 190celcius for 20 minutes. Flip and bake another 5 minutes.

4. crust is ready, please feel free to put whatever topping you like!
❤️❤️❤️

NOTE:
Each oven is different, so make sure you keep watch over your pizza base while it is baking. Most ovens can be off, especially if you have never recalibrated your oven since you first bought it.
Apparently, like a piano, ovens also need tuning. Or in this case recalibrating.

Here’s the pizza I made the other day at home with this base. It was a big hit
pizza
Please tag me on instagram @sophienavita when you decide to make it. Don’t forget to take pictures!!

If you haven’t subscribed to my #LoveLettersFromSophie , you should NOW. Because nobody ever writes or receives love letters anymore these days, except for some rare species of human like ME! Here’s that link again. Click NOW.

soph

TOMATO TORCH GINGER POMODORO

By | Recipes | No Comments

Congratulations!

Whoops! Did I just say that out loud? ☺

I get all excited and celebratory when I try out something new in the kitchen and it turns out PERFECT!

I know, I know. It’s just tomato sauce. Pomodoro.
NO. IT’S. NOT.

My original recipe was the Pomodoro di Sophia. But then this happened!! (I wish I could have some background sound effects for this ha ha !)

Who am I kidding? I am NOT Italian. Although that would be cool ☺
I whipped out an Asian herb and hey lo, behold!

The secret ingredient that makes this recipe standout is TORCH GINGER. You’ve probably heard of it by it’s other names, like ginger liliy, wild ginger, Philippine wax flower, bunga kantan, kecombrang, xiang bao jiaing, boca de dragon, and many more.
It is a fragrant flower, almost like a successful marriage between lemongrass and ginger.

torch

If you ever find one in your local Asian store, you will love this aromatic. You just use the flower part (the bud) and chop it up. The stem is less fragrant though, so I seldom use it. Even if I do, I only the stem around the base of the flower and never go further than 3cm from that. This part of the flower, I use to make my own Veggie Stock.

Please don’t worry too much, if you do not find this flower in your country. This recipe will still work well. Just not as fragrant, but it will still WORK WELL.

On to the recipe, shall we?

snnnn

TOMATO TORCH GINGER POMODORO

INGREDIENTS:

•1/2 cup brown onion, diced
• 3 cloves of garlic, roasted in foil
• 1/2 tsp chile flakes
• 1 cup finely diced red bell peppers( to help sweeten the sauce)
• 2 Tablespoons chopped torch ginger
• 1/4 cup vegetable stock
• 6 to 8 leaves fresh basil, ripped
• 5 cups heirloom tomatoes, cored and small–diced
• freshly ground black pepper, to taste
• 6 to 8 leaves fresh basil, ripped
• 1 Tablespoon coconut sugar (optional)

DIRECTIONS:

Wrap garlic ( UN-peeled) in foil and roast in oven for 15-20 minutes. Will be ready to use after, just peel of skin when done and mash it. Be careful, as it will be HOT.

In a large fry pan, or pot, dry sauté ( no oil) the onion until they release fragrance, then add garlic until they begin to almost caramelize.
Add the chile flakes, torch ginger and the optional red bell peppers and cook until they melt and blend with the onions and garlic.

At this point, add just enough vegetable stock to deglaze the pan and cook for 4 minutes or until onions are translucent.our goal is to NOT burn the aromatics at this point
To finish the sauce, add the cored chopped tomatoes and cook on medium–low heat for 20 to 25 minutes, tossing or stirring to be sure they do not stick to the pan. Deglaze again with veggie broth ONLY WHEN NEEDED. We need the sauce to thicken and not end up with a runny sauce.
Add freshly-ground black pepper and remove from heat. Add the fresh basil and stir in evenly.

Take out half of the batch and blend in a food processor then put back in pan and over low heat. Keep stirring until liquid reduces, for we want a thick sauce, not runny.
Alternatively, you can also blend the whole batch for a smoother sauce, of course, please wait for sauce to cool down before proceeding to blend in blender or FP.

Note:
Torch Ginger just makes it more dramatic and in depth. Try your local Asian store to get this ingredient. If not possible, it’s totally OKAY ❤️ it will still make a good #homemade tomato pomodoro 😘😘
You can always use a ready made store bought Veggie Stock or Veggie Broth. I always make my own, and you can find out how to do that here

As usual, please, please tag me on instagram @sophienavita when you make this recipe. I’m on Facebook too at Sophie Navita .

Please feel free to share this recipe to friends and family. Tweet it ☺’

If you haven’t subscribed to my #LoveLettersFromSophie , you should NOW. Because nobody ever writes or receives love letters anymore these days, except for some rare species of human like ME! Here’s that link again. Click NOW.

rsz_sn

BLUEBERRY FRENCH VANILLA ICE STICKS

By | Recipes | No Comments

I have always been fond of ice cream.

Okay… wait. Let me rephrase that.

HI, MY NAME IS SOPHIE AND I AM AN ICE CREAM LOVER.

I don’t know anybody in my life that does not like ice cream. Or, I probably don’t want to know anybody in my life that does not like ice cream. Ha ha.

How can you NOT like ice cream? It’s creamy, and velvety and delicious and cold and fun. Ice Cream are all those things I have listed, UNLESS you have an allergy to dairy, like I do.

First of all, I can’t really digest cow’s milk.

Second of all, I have never liked the taste of cow’s milk.

Third of all, Cow’s Milk makes me gassy and bloated.

Fourth of all, if you think your only source of calcium is from cow’s milk, then you have been misled. Cow’s milk actually leeches your calcium from you.

Fifth of all, I am not going to go into more details, because you can always do some research on point number 4, and also because I want to get to this super delicious recipe quickly.

So, in short, because of my intolerance towards dairy products, I have stopped consuming them. Guess what? I feel so much lighter in mood and balance, probably in weight too ( I got rid of my weighing machine a long time ago) . I also  never suffer from scratchy throats, mouth ulcers, bloatingunnamedtummy and shortness of breath anymore. Yayyyyy!!

But, I must say, I do miss it! So what did I do, ever since I STOPPED taking all kinds of dairy milk 8 years ago? I tried to recreate that texture and taste in a healthier option. I found CASHEWS!

WAIT… I am not saying that cashews are the best food on earth. But I know, it’s a better option in a lot of ways for me. And come on, you’re not supposed to eat THAT MUCH cashews anyways.

This is a TREAT kind of dish…ON A STICK. Ha Ha.

I turned this ice cream into popsicle style.

bb
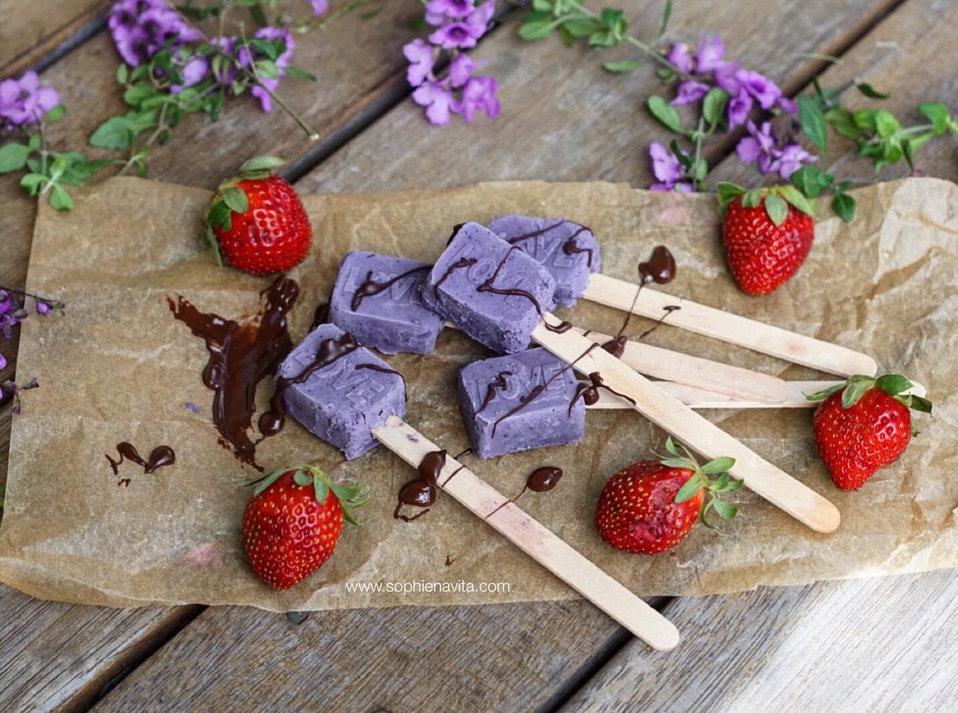
When I first started to make this recipe in the kitchen, I didn’t think of anything else, but to make a French Vanilla Ice Cream creation come to reality in a healthier option. But then, I looked into my refrigerator and saw that i had had a bit of frozen blueberries standing by. So, what’s a chef to do? Throw it ALL in and baptize it with a new name !!

Here’s the recipe for you now. You can thank me later!

BLUEBERRY FRENCH VANILLA ICE STICKS

Ingredients:

1 cup raw cashews (soaked)
1/2 cup fresh or frozen blueberries
1/2 cup almond milk
1/2 cup water
1/4 cup coconut nectar
1 teaspoon vanilla powder (scrape off from vanilla pod)
1/4 teaspoon cardamom powder
1 Tablespoon rum

Method:
1. Blend Raw Cashews with almond milk and water + coconut nectar in a high powered blender until you achieve a smooth and creamy consistency

2. Next, add in all the other ingredients into the blender and blend until well incorporated. A little tip from me is to add in the blueberries last and just blend it in quickly, so you end up with a coarse mixture of the blueberries in your cashew mixture. It will just look better in pictures, I think.

3. Pour into rectangle jelly moulds and freeze for about 4 hours. After 4 hours, take it out of the moulds and slowly stick in ice cream sticks. This step needs to be done gently but quickly so you do not break the rectangle ice cream. (If you live in a hot country and find that at this step the ice cream is still soft and mushy, stick it back in the refrigerator and wait a bit more)

4. Stick it back in the fridge and it will be ready to be devoured  in another 8 hours. I like to leave mine overnight. It just tastes better and firmer.

Note:
This is the simplest form of homemade ice cream. I have found that if I use a bit of guar gum, I get a better texture. Also, if you have an ice cream machine, you are more than welcome to use it before you put them in moulds and freeze.
rsz_sn
Here’s the picture again, JUST IN CASE you decide to procrastinate—which I’m sure you won’t 😀

PLEASE PLEASE make this recipe. And let me know how it goes. You can leave a comment here, or TAG me on instagram at @sophienavita so I can see your creations

If you’re family gets hooked on this recipe, you will be beaming with joy. You’re welcome!!

P.S: This recipe works very well if you need to impress people like: FUTURE MOTHER IN LAW

If you haven’t subscribed to my #LoveLettersFromSophie , you should NOW. Because nobody ever writes or receives love letters anymore these days, except for some rare species of human like ME! Here’s that link again. Click NOW.

image3

Spelt Waffles

By | Recipes | No Comments

Hello..

Have you ever worked with any ingredients that are new to you?

I know this might sound crazy to some, but apparently, this is my FIRST time working with spelt flour!! 😃😃

I never thought I could be eating spelt because even though it’s wheat free, it still contains a low amount of gluten.

I have been doing some experiments on my body lately. So if you have been following me for a bit, you must know by now that I have some sort of intolerance to gluten. I’m pretty sure everybody does, but maybe in different ways. Some milder than what others would experience.

I am not highly intolerant to gluten to the point where I could be hospitalized by it. I really feel for those of you who totally cannot have gluten. 😩

So what happens when I eat gluten? My tummy gets so bloated as if I am 4 months pregnant, and the whole day would just be a mess for me. I would be so irritable and my mind cannot think clear. And I wish it were just a case of gas in my tummy that I can expel through random series of burps and farts.. Oopssy.. Gross I know, but how else do I explain? Okay, passing wind. 😃😃

Lately though, I have been daring myself to try to reintroduce wheat again in my diet ( please do not follow what I do, as my only grounds of reintroducing wheat in my diet was because I needed to–after a series of allergy elimination techniques I am working on with my Naturopath.)

The result? I find that if I have organic wheat products, and just enough, not too much, I am totally okay with it. So Yayyy for that. It’s progress, don’t you think?

Although, I must say, I am not a fan of wheat, so just a little bit occasionally and must be organic, is safe for me 😊

Back to topic, ever since this episode, I have also dared myself to try SPELT. Spelt is high in fibre and low in fat. It is an ancient grain, also known as triticum spelta. You must not confuse this with bread wheat which is mostly from triticum sativum ( bread wheat).

spelt-flour

The first time I tried to make a SPELT pancake though, I failed. 😃😃 I did not like the texture. It felt gooey and just not my cup of tea, even though my friends and family still ate it and said it was good ( either it was good, or they just love me and don’t want to hurt my feelings haha!)

my-spelt-flour-pancakes

This is a picture of my first try at using SPELT. The chocolate sauce saved the whole dish, I think! 😃😃

 So I decided to read up on it and finally found what my recipe lacked of! BAKING POWDER. Okay.
Problem solved. Sometimes it’s just the simple things that one should look into, wouldn’t you agree?
Okay, I will shush now and just give you the recipe. It’s so simple, YOU. MUST. TRY.
SPELT WAFFLES
Ingredients:
1/2 cup spelt flour
1/2 cup sorghum flour
2 tsp baking powder
1 scoop of vegan vanilla protein powder( optional)
Pinch of sea salt
1/2 ripe banana
1 cup non dairy milk ( I used almond)
1 tsp lemon juice of apple cider vinegar
1 teaspoon coconut nectar ( your choice of sweetener)
1/4 cup water ( no need, if you omit protein powder)
Method:
1. Put ingredients 1-5 in a mixing bowl, set aside
2. Put ingredients 6-9 in a blender and blend until smooth. Or you can also do manually by mashing the banana with a fork( this will take a little longer and consistency will not be as smooth)
3. Pour the mixture in no.2 to the mixing bowl of dry ingredients (which is no.1) and fold in until you get a thick but still watery pancake consistency.
4. Add in the 1/4 cup water a little bit at a time, ONLY when needed. You will need this if you use the protein powder, but if not, I find that I didn’t need to add any.
5. Heat your pancake pan, or in my case a waffle pan, brush lightly with coconut oil, then cook waffles for about 3-4 minutes. The centre will start to bubble, FLIP and cook for another 1 minute, and you’re done!!
Note: you may put 1 cup spelt for this recipe, it works too!
I just did my own thing by doing 1/2 spelt and 1/2 sorghum.
A little word of advice though: THESE WAFFLES DISAPPEAR REALLY FAST! 😃😃 your family will love them!
ENJOY with your favorite fruit or jam or chocolate sauce.
my-spelt-waffles
my-spelt-waffles-final
Please make sure you tag me on instagram at @sophienavita if you make these. I would love to know your thoughts on SPELT. I really am NEW to spelt. 😃😃
Wishing you lots of love today. Remember, you are enough.
LOVE. LOVE. LOVE!